No Gelatin Marshmallow
No Gelatin Marshmallow
🥄 Prep: 15 min
🔥 Cook: 10 min
🍽 Serves: 2 servings
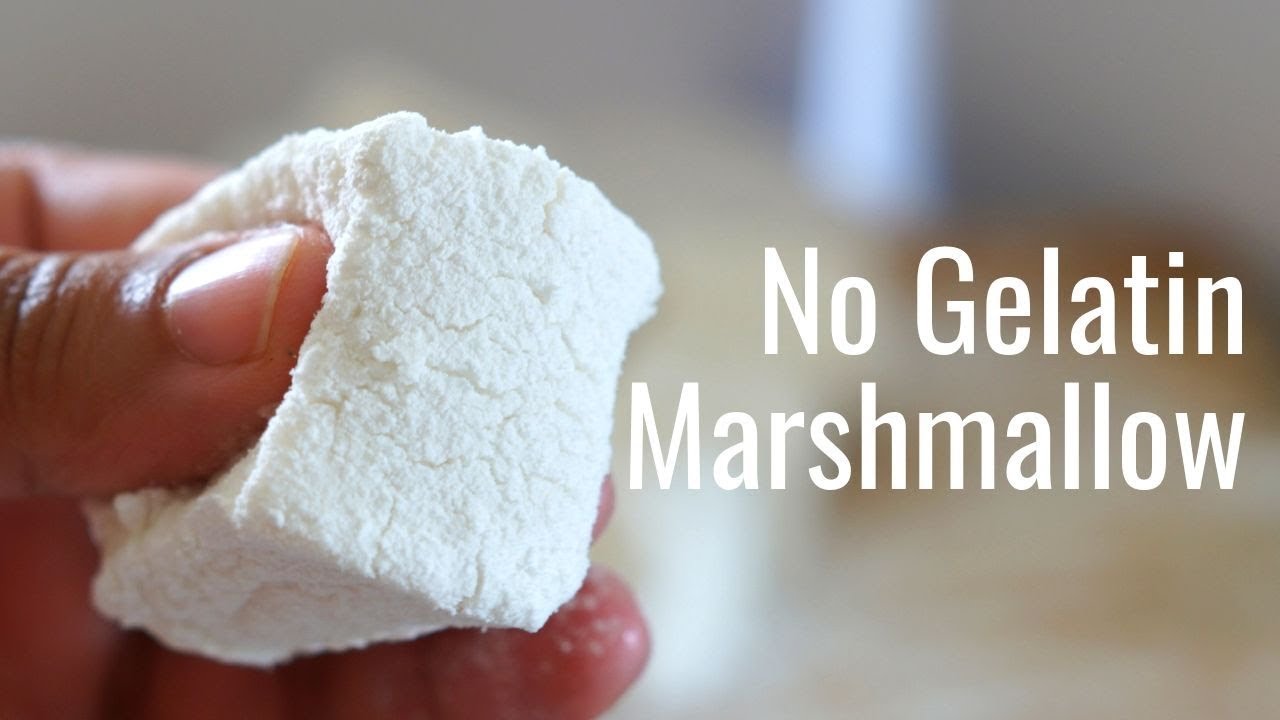
Soft, bouncy, and guilt-free marshmallows made with real food and zero gelatin — sweet magic that you will want to make again and again.
Why You’ll Love This Recipe
If you have ever dreamed of biting into a cloud-like, pillowy marshmallow without any gelatin or refined sugar, you are going to fall in love with this recipe from Neetu Sirigiri. These soft, fluffy marshmallows are made entirely from real whole ingredients and are completely eggless and gluten-free, making them a treat the whole family can enjoy.
Unlike store-bought marshmallows loaded with refined sugars and artificial additives, these beauties are naturally sweetened and packed with nourishing ingredients that give you a little protein boost too. You will feel genuinely good about serving these to your loved ones because every ingredient earns its place in the bowl.
- ✅ Completely gelatin-free and vegan-friendly, so everyone at the table can enjoy a marshmallow moment without compromise
- ✅ Made with no refined sugar, giving you all the sweetness you crave from wholesome natural sources instead
- ✅ Eggless and gluten-free, making this a safe and delicious option for people with common dietary restrictions or allergies
- ✅ High in protein from real food ingredients only — no protein powder needed, just honest nourishing goodness in every bite
Ingredients You’ll Need
(Full measurements in the recipe card below)
Syrup Base
- • 1 cup sugar — sweetness and structure
- • 1/2 cup water — dissolves sugar
- • 2 tbsp corn syrup — prevents crystallization
- • 1/4 tsp salt — balances sweetness
Aquafaba Foam
- • 1/2 cup aquafaba — chickpea liquid replaces gelatin and egg white
- • 1/4 tsp cream of tartar — stabilizes foam
- • 1 tsp vanilla extract — flavour
- • 2 tbsp cornstarch plus powdered sugar — dusting to prevent sticking
Substitutions
| Ingredient | Swap |
|---|---|
| corn syrup | agave syrup or honey |
| aquafaba | canned chickpea liquid works best |
| white sugar | coconut sugar changes colour but works |
How to Make It — Step by Step
Whip Aquafaba
Beat aquafaba and cream of tartar on high speed until stiff glossy peaks form, about 8 to 10 minutes. Set aside.
Cook Syrup
Combine sugar, water, corn syrup and salt in a saucepan. Cook on medium heat without stirring until it reaches 235F to 240F soft ball stage.
Stream and Beat
With mixer running on low, slowly pour hot syrup in a thin stream into the aquafaba. Increase to high and beat for 10 to 12 minutes until thick, fluffy and cooled.
Add Vanilla and Set
Mix in vanilla extract. Pour into a parchment lined pan dusted with cornstarch and powdered sugar mix. Smooth the top and dust again. Rest for 6 hours or overnight.
Cut and Serve
Lift marshmallow slab out and cut into squares with an oiled knife. Toss pieces in cornstarch and powdered sugar to coat all sides. Store in an airtight container.
Tips for the Best Result
Make sure your aquafaba is whipped to very stiff, glossy peaks before adding sugar syrup – this is the key to marshmallows that hold their shape without gelatin.
Use a candy thermometer and bring your syrup to exactly 240F (soft ball stage) – too low and your marshmallows will not set, too high and they will be grainy.
Coat your pan and the tops of your marshmallows with a generous layer of tapioca starch or arrowroot powder to prevent sticking and keep that classic marshmallow texture.
How to Store
Frequently Asked Questions
Whipped aquafaba (the liquid from canned chickpeas) combined with a hot sugar syrup creates the same fluffy, set texture as gelatin-based marshmallows.
Canned aquafaba works best as it has a consistent concentration – homemade liquid can be too thin and may not whip to stiff peaks reliably.
Yes, this recipe is completely vegan, eggless, and gelatin-free, making it suitable for plant-based diets.
Yes, you can briefly torch these with a kitchen blow torch for a toasted finish, though they may melt faster than traditional marshmallows.
Nutrition Per Serving
| Nutrient | Per Serving (2 servings) |
|---|---|
| Calories | — |
| Protein | — |
| Carbohydrates | — |
| Fiber | — |
| Fat | — |
| Sugar | — |
Estimates only — values vary with exact brands used.
Ingredients
Instructions
- 1. Beat aquafaba and cream of tartar on high speed until stiff glossy peaks form, about 8 to 10 minutes. Set aside.
- 2. Combine sugar, water, corn syrup and salt in a saucepan. Cook on medium heat without stirring until it reaches 235F to 240F soft ball stage.
- 3. With mixer running on low, slowly pour hot syrup in a thin stream into the aquafaba. Increase to high and beat for 10 to 12 minutes until thick, fluffy and cooled.
- 4. Mix in vanilla extract. Pour into a parchment lined pan dusted with cornstarch and powdered sugar mix. Smooth the top and dust again. Rest for 6 hours or overnight.
- 5. Lift marshmallow slab out and cut into squares with an oiled knife. Toss pieces in cornstarch and powdered sugar to coat all sides. Store in an airtight container.
▶ Watch Me Make It
See every step in action.
MasterChef India contestant turned healthy baking creator. I specialise in eggless, no-oven, and gluten free recipes made with real ingredients — no protein powder, no shortcuts. Subscribe on YouTube for a new recipe every week!
Enjoyed this recipe?
Follow me for new healthy baking recipes every week!
Give this No Gelatin Marshmallow recipe a try and let us know how it turns out for you. Tag us on Instagram at bakewithneetu so we can celebrate your creation together.
//600?”block”:”none”;};})();
//]]>