Eggless Ladi Pav
Eggless Ladi Pav
🥄 Prep: 15 min
🔥 Cook: 10 min
🍽 Serves: 2 servings
Fluffy, eggless, and made with love, these homemade Ladi Pav bring the heart of Mumbai street food straight to your kitchen table.

Why You’ll Love This Recipe
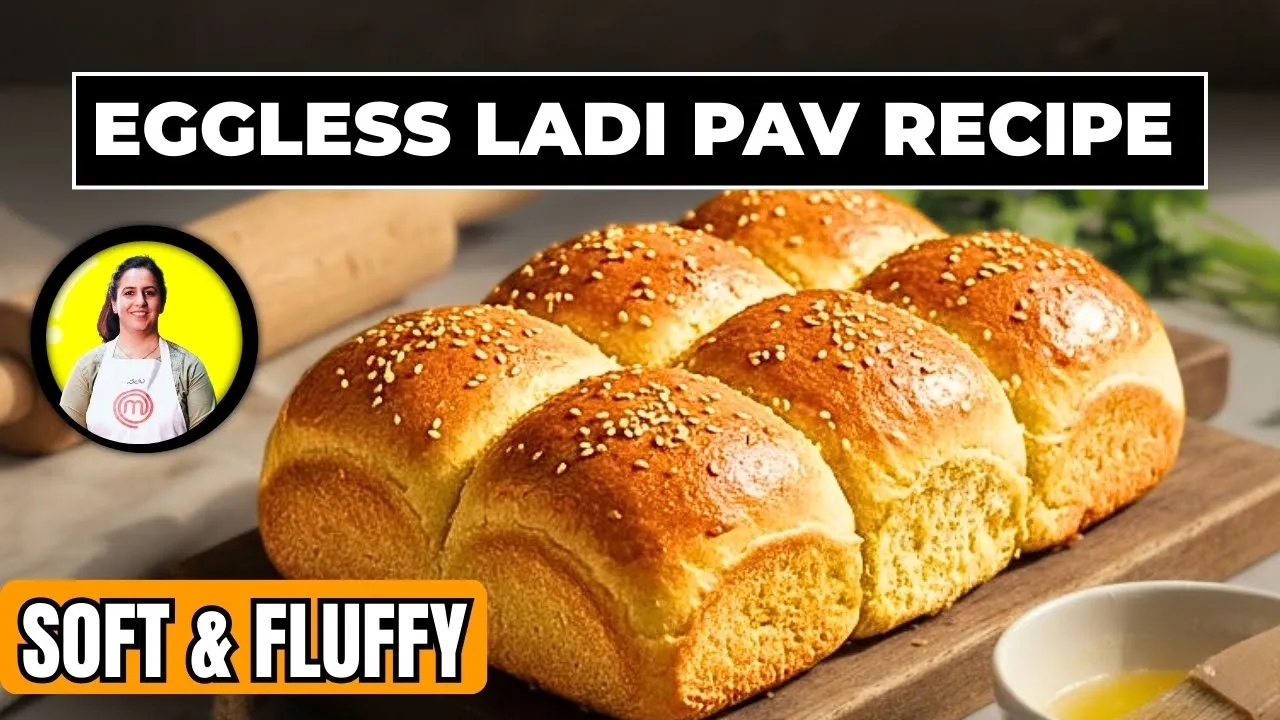
Soft, pillowy, and utterly irresistible, these Eggless Ladi Pav are everything you love about the classic Mumbai street bread, baked right in your own home kitchen by Neetu Sirigiri, your MasterChef India Telugu Top 8 host at Bake With Neetu. Whether you are serving them with bhaji, filling them with a spicy potato mix, or simply slathering them with butter, this recipe will become your go-to bread bake every single week.
Made without eggs and with the option to use wholesome oil or butter, these soft rolls are a lighter, more inclusive choice that the whole family can enjoy without compromise. The real food approach at Bake With Neetu means you are nourishing your loved ones with simple, honest ingredients you can actually trust.
- ✅ Completely eggless, making these soft pav rolls perfect for vegetarians and those with egg allergies without sacrificing any texture or flavour.
- ✅ No refined sugar overload, as just one tablespoon of sugar is all it takes to activate the yeast and give the bread a gentle, balanced sweetness.
- ✅ Made with real, whole ingredients you already have in your pantry, staying true to the Bake With Neetu philosophy of no protein powders and no artificial shortcuts.
- ✅ Incredibly versatile and crowd-pleasing, these Ladi Pav pair beautifully with pav bhaji, vada pav, or even a simple spread of butter for a satisfying everyday bread.
Ingredients You’ll Need
(Full measurements in the recipe card below)
Dough
- • 2 cups maida — base flour
- • 1/4 cup extra maida — for dusting
- • 2 tsp active dry yeast — gives rise
- • 1 tbsp sugar — feeds yeast
- • 1 tsp salt — balances flavor
Wet and Finish
- • 3/4 cup water or milk — milk gives softness
- • 3 tbsp butter or oil — adds richness
- • 2 tsp unsalted butter — top glaze
Substitutions
| Ingredient | Swap |
|---|---|
| maida | whole wheat flour for more protein |
| butter | coconut oil to keep vegan |
| water | warm milk for fluffier pav |
How to Make It — Step by Step
Activate Yeast
Mix yeast and sugar into warm water or milk. Let it sit for 10 minutes until it is frothy and bubbly.
Make the Dough
Add maida and salt to the yeast mixture. Add butter or oil. Knead for 8 to 10 minutes until the dough is soft and smooth.
First Rise
Place dough in a greased bowl, cover with a damp cloth, and let it rest in a warm spot for 1 hour until it doubles in size.
Shape and Second Rise
Punch the dough down, divide into equal balls, and place them touching in a greased tray. Let them rise again for 30 minutes.
Bake and Glaze
Bake at 180 degrees C for 20 minutes until golden. Immediately brush with unsalted butter for that soft, shiny top.
Tips for the Best Result
Always activate your yeast in warm water or milk with sugar for 5 to 10 minutes before adding it to the flour. If it does not turn frothy, your yeast is dead and the pav will not rise.
Brush the pav generously with unsalted butter as soon as it comes out of the oven. This gives the rolls their signature soft, shiny, and pillowy top.
Place the dough balls close together in your baking tray so they bake against each other. This is what creates the classic pull-apart ladi pav texture.
How to Store
Frequently Asked Questions
Yes, but the pav will be slightly denser. Use 50 percent whole wheat and 50 percent maida for a softer result.
Yes, use the same quantity and mix it directly into the flour without proofing in water first.
Your yeast may be expired or the liquid was too hot and killed it. Always use warm, not hot, water or milk for proofing.
Yes, replace butter with oil and use water instead of milk for a completely dairy free version.
Nutrition Per Serving
| Nutrient | Per Serving (2 servings) |
|---|---|
| Calories | — |
| Protein | — |
| Carbohydrates | — |
| Fiber | — |
| Fat | — |
| Sugar | — |
Estimates only — values vary with exact brands used.
Ingredients
- → 2 cups of maida/flour
- → 3/4 cups of water /milk
- → 3 tbsp of butter /oil
- → 1 tbsp of sugar
- → 1/4 of extra flour or maida
- → 2 tsp of unsalted butter
- → 2 tsp of active dry yeast
- → 1 tsp of salt
Instructions
- 1. Mix yeast and sugar into warm water or milk. Let it sit for 10 minutes until it is frothy and bubbly.
- 2. Add maida and salt to the yeast mixture. Add butter or oil. Knead for 8 to 10 minutes until the dough is soft and smooth.
- 3. Place dough in a greased bowl, cover with a damp cloth, and let it rest in a warm spot for 1 hour until it doubles in size.
- 4. Punch the dough down, divide into equal balls, and place them touching in a greased tray. Let them rise again for 30 minutes.
- 5. Bake at 180 degrees C for 20 minutes until golden. Immediately brush with unsalted butter for that soft, shiny top.
▶ Watch Me Make It
See every step in action.
MasterChef India contestant turned healthy baking creator. I specialise in eggless, no-oven, and gluten free recipes made with real ingredients — no protein powder, no shortcuts. Subscribe on YouTube for a new recipe every week!
Enjoyed this recipe?
Follow me for new healthy baking recipes every week!
Give this eggless ladi pav recipe a try and enjoy the softest homemade buns straight from your oven. Tag Bake With Neetu on Instagram so Neetu can celebrate your beautiful bake with you.
//600?”block”:”none”;};})();
//]]>