Eggless Red Velvet recipe- Easy cupcake recipe in Convention Microwave(mini red velvet cupcake)
Eggless Red Velvet recipe- Easy cupcake recipe in Convention Microwave(mini red velvet cupcake)
🥄 Prep: 15 min
🔥 Cook: 10 min
🍽 Serves: 2 servings
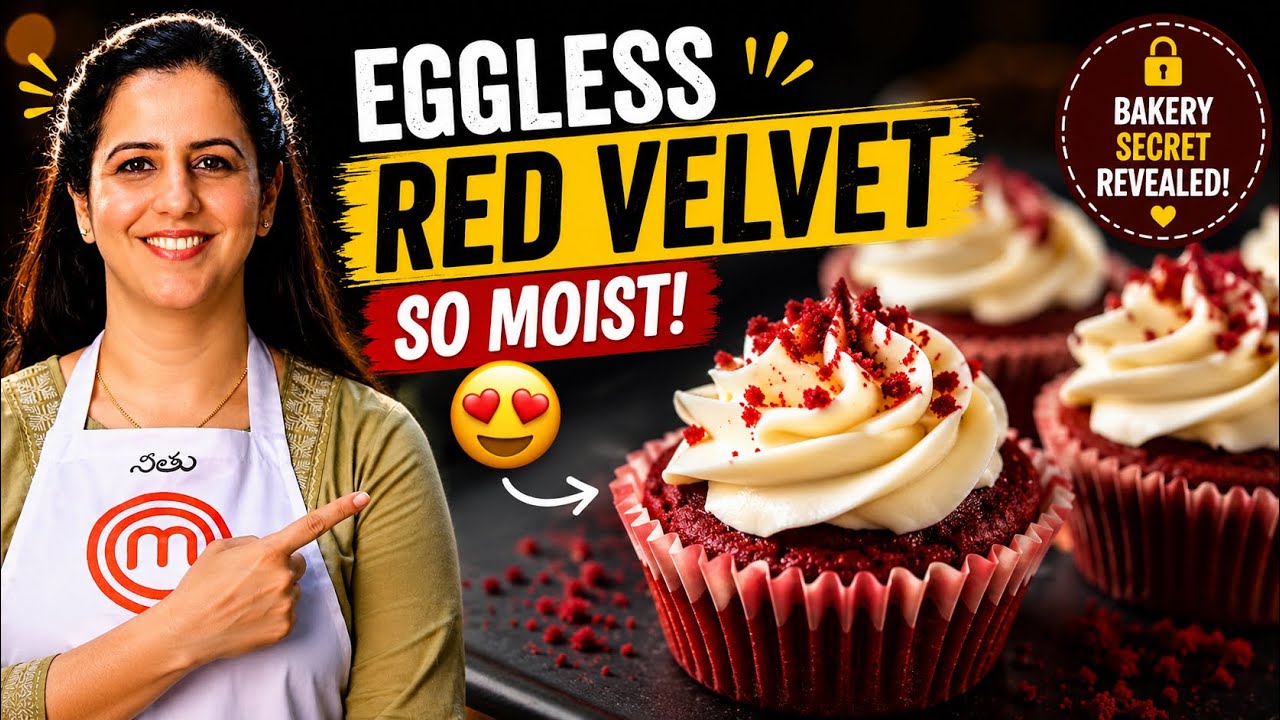
These mini red velvet cupcakes prove that eggless baking can be just as indulgent, beautiful, and crowd-pleasing as any traditional recipe.
Why You’ll Love This Recipe
Get ready to fall in love with these gorgeous little Eggless Red Velvet Cupcakes that are as stunning to look at as they are delicious to eat! Neetu Sirigiri, Bake With Neetu founder and MasterChef India Telugu Top 8 contestant, has created this foolproof recipe that you can bake right in your convection microwave with zero fuss.
Made with wholesome buttermilk and apple cider vinegar, these cupcakes are naturally lighter on the tummy and completely egg-free, making them perfect for vegetarians and anyone with egg allergies. The combination of cocoa and tangy buttermilk gives you a rich, moist crumb that satisfies every sweet craving without weighing you down.
- ✅ 100 percent eggless and vegetarian-friendly, so everyone at the table can enjoy a cupcake without worry
- ✅ Apple cider vinegar and buttermilk work together to give a tender, fluffy crumb and a subtle tang that makes every bite feel gourmet
- ✅ Quick and convenient convection microwave method means you do not need a full-size oven to bake bakery-style cupcakes at home
- ✅ Made with simple pantry staples you already have on hand, keeping this recipe budget-friendly and beginner-approved
Ingredients You’ll Need
(Full measurements in the recipe card below)
DRY
- • 1.5 cups maida — base structure
- • 3/4 cup sugar — sweetness
- • 1 tbsp cocoa powder — subtle chocolate flavour
- • 1 tsp baking soda — rise agent
- • 1/4 tsp salt — balances sweetness
WET
- • 1 cup buttermilk — moisture and tang
- • 1/4 cup oil — keeps cupcakes soft
- • 1 tsp vanilla essence — rounds the flavour
- • 1 tsp apple cider vinegar — reacts with soda for rise
- • red food colour — signature red hue
Substitutions
| Ingredient | Swap |
|---|---|
| buttermilk | 1 cup milk plus 1 tsp lemon juice, rest 5 minutes |
| apple cider vinegar | white vinegar or lemon juice |
| maida | whole wheat flour for slightly denser but healthier cupcakes |
How to Make It — Step by Step
Preheat and Prep
Preheat your convection microwave to 180C. Line a mini cupcake tray with liners and set aside.
Mix Dry Ingredients
In a bowl whisk together maida, sugar, cocoa powder, baking soda and salt until well combined.
Mix Wet Ingredients
In a separate bowl combine buttermilk, oil, vanilla essence, apple cider vinegar and red food colour. Stir well.
Combine and Fill
Pour wet ingredients into dry ingredients and fold gently until just combined. Do not overmix. Spoon batter into liners up to 3/4 full.
Bake
Bake in convection mode at 180C for 12 to 15 minutes. Insert a toothpick in the centre and if it comes out clean the cupcakes are done. Cool on a wire rack before frosting.
Tips for the Best Result
Always use buttermilk at room temperature so it combines smoothly with the other ingredients and gives your cupcakes a soft, even crumb.
Mix the batter just until the dry ingredients disappear into the wet. Overmixing will make your cupcakes dense and rubbery instead of light and fluffy.
Use gel food colour instead of liquid for a deeper, more vibrant red without thinning out your batter or altering the texture of the cupcakes.
How to Store
Frequently Asked Questions
Yes, you can bake these cupcakes in a regular OTG at 180 degrees Celsius for 18 to 20 minutes.
Mix 1 cup of regular milk with 1 tablespoon of lemon juice or vinegar, let it sit for 5 minutes, and it is ready to use.
Yes, whole wheat flour works but the cupcakes will be slightly denser. You can also use a 50-50 mix for a lighter result.
Liquid food colour gives a dull result. Switch to gel food colour for a rich, bold red colour that stays vibrant after baking.
Nutrition Per Serving
| Nutrient | Per Serving (2 servings) |
|---|---|
| Calories | — |
| Protein | — |
| Carbohydrates | — |
| Fiber | — |
| Fat | — |
| Sugar | — |
Estimates only — values vary with exact brands used.
Ingredients
- → 1+ 1/2 cup maida/flour
- → 3/4 sugar
- → Red food Colour
- → 1 tsp of apple cider vinegar
- → 1 tsp of vanilla essence
- → 1/4 cup of oil
- → 1 tbsp of Cocoa powder
- → 1 tsp of baking soda
- → 1/4 tsp of salt
- → 1 cup buttermilk
Instructions
- 1. Preheat your convection microwave to 180C. Line a mini cupcake tray with liners and set aside.
- 2. In a bowl whisk together maida, sugar, cocoa powder, baking soda and salt until well combined.
- 3. In a separate bowl combine buttermilk, oil, vanilla essence, apple cider vinegar and red food colour. Stir well.
- 4. Pour wet ingredients into dry ingredients and fold gently until just combined. Do not overmix. Spoon batter into liners up to 3/4 full.
- 5. Bake in convection mode at 180C for 12 to 15 minutes. Insert a toothpick in the centre and if it comes out clean the cupcakes are done. Cool on a wire rack before frosting.
▶ Watch Me Make It
See every step in action.
MasterChef India contestant turned healthy baking creator. I specialise in eggless, no-oven, and gluten free recipes made with real ingredients — no protein powder, no shortcuts. Subscribe on YouTube for a new recipe every week!
Enjoyed this recipe?
Follow me for new healthy baking recipes every week!
Give these gorgeous mini red velvet cupcakes a try and let us know how they turned out for you! Tag us on Instagram at bakewithneetu so we can celebrate your beautiful bake together.
//600?”block”:”none”;};})();
//]]>